Coordinate Multisig
Now that we have all your public key information in Specter-Desktop, we need to create your 2-of-3 multisig wallet.
We tell Specter-Desktop and each hardware wallet that these are your 3 public keys and that any 2 of them is sufficient to sign a transaction.
This is a one-time setup that you’ll never need to repeat.
Configure Multisig Wallet in Specter-Desktop
-
On Specter Desktop, select
+ Add new wallet>Multisignature wallet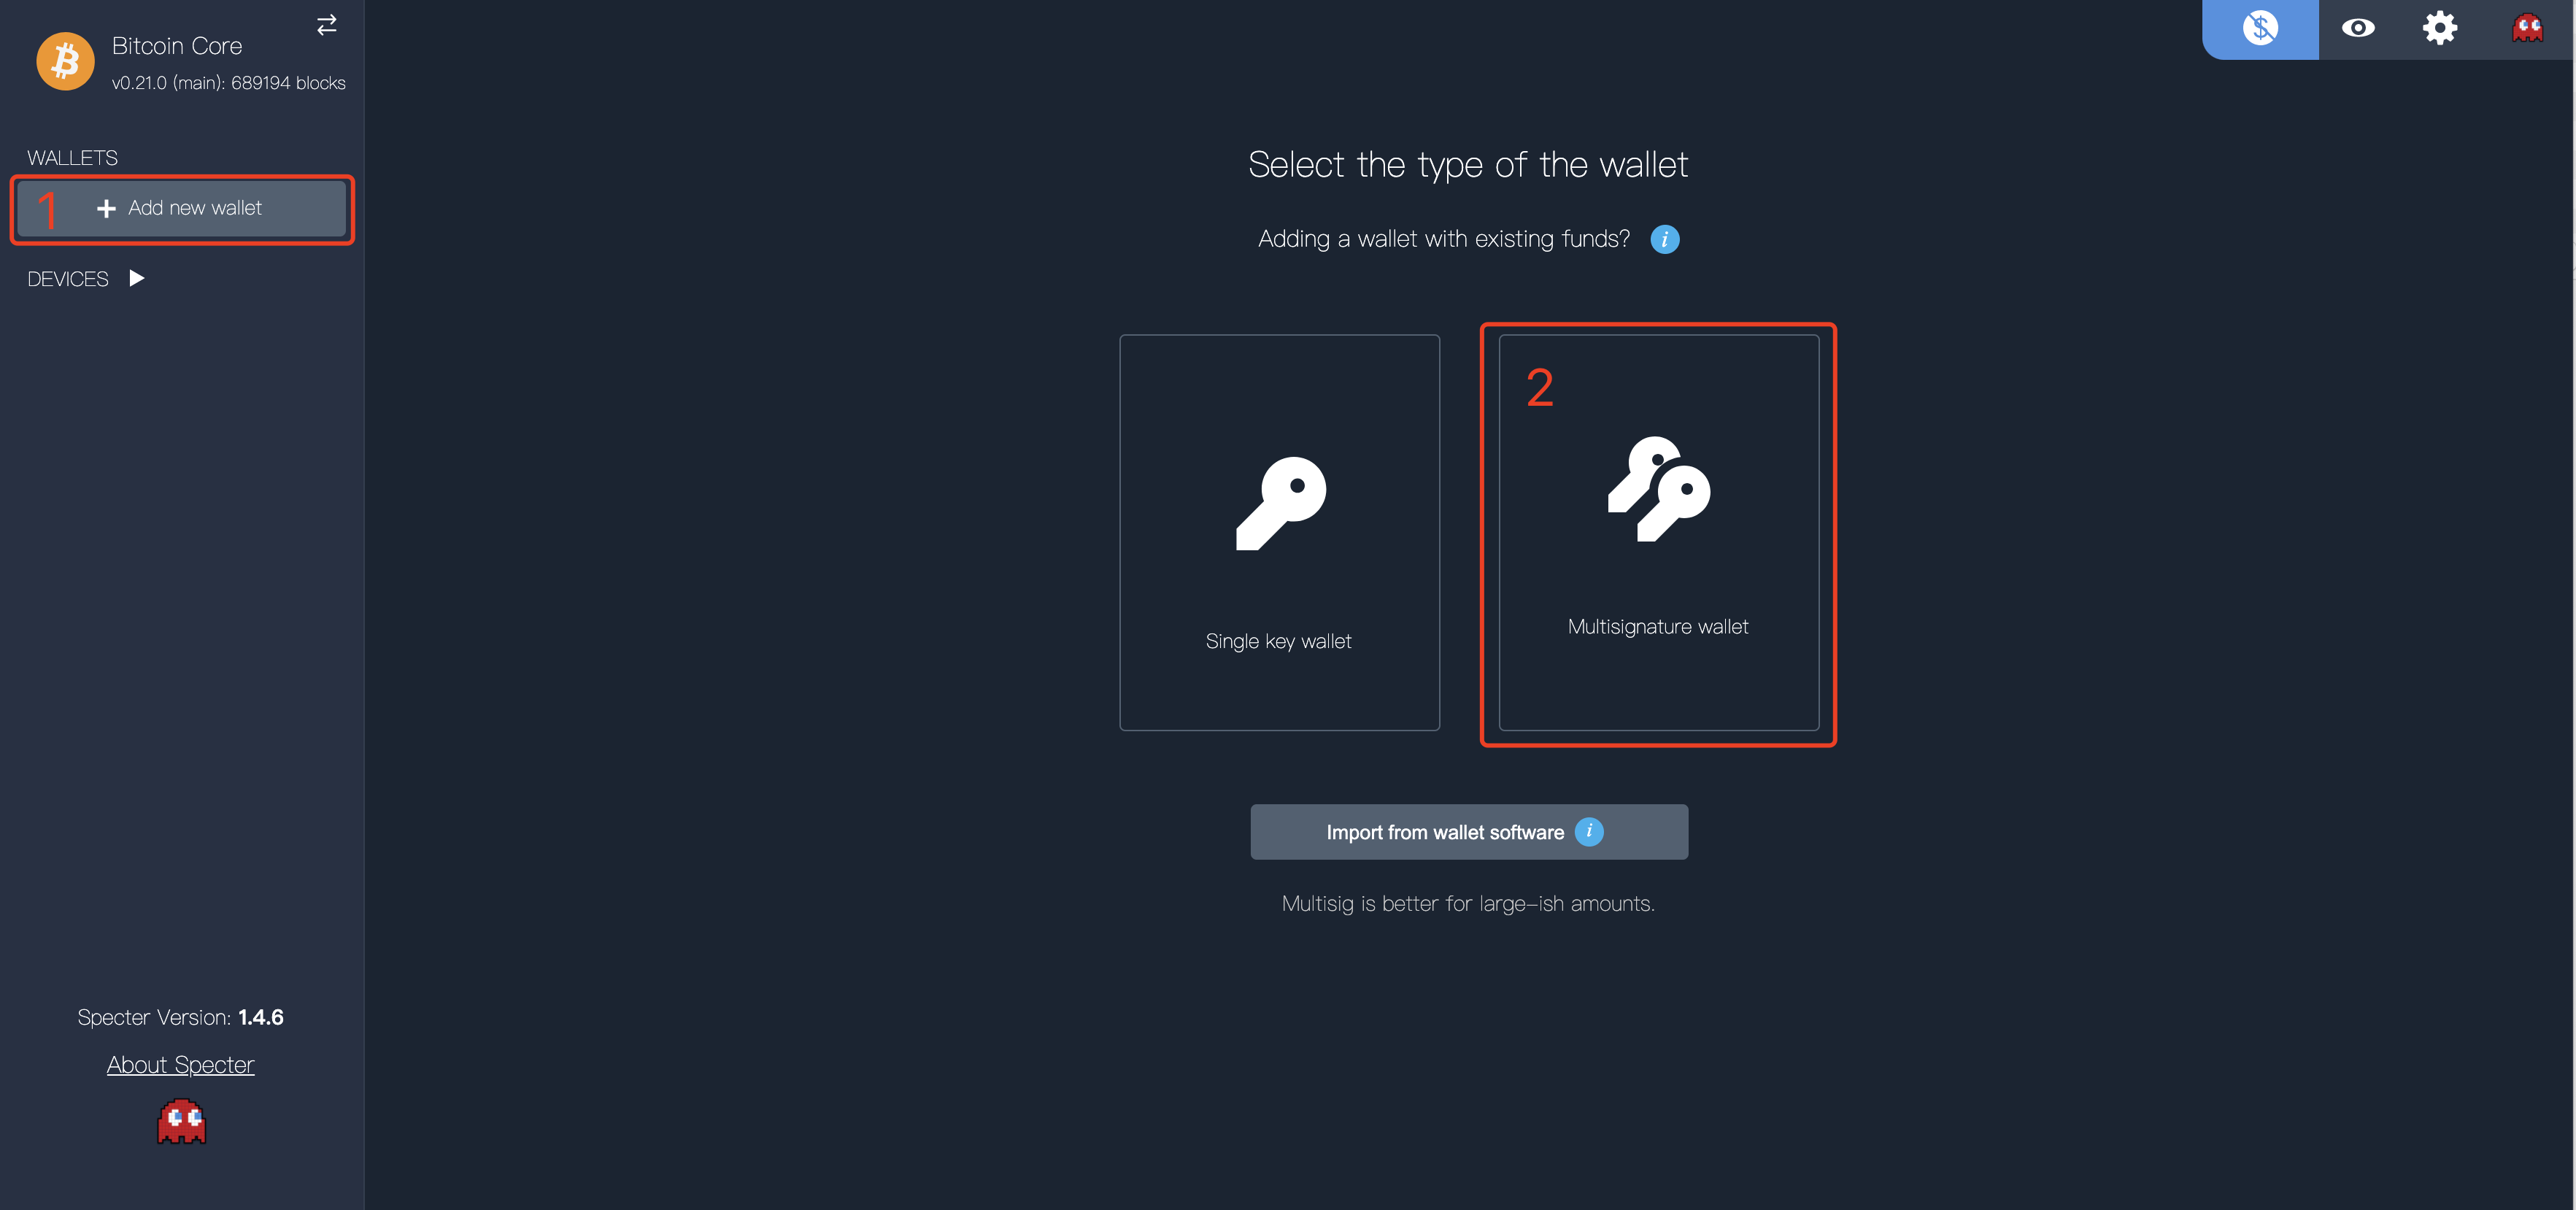
-
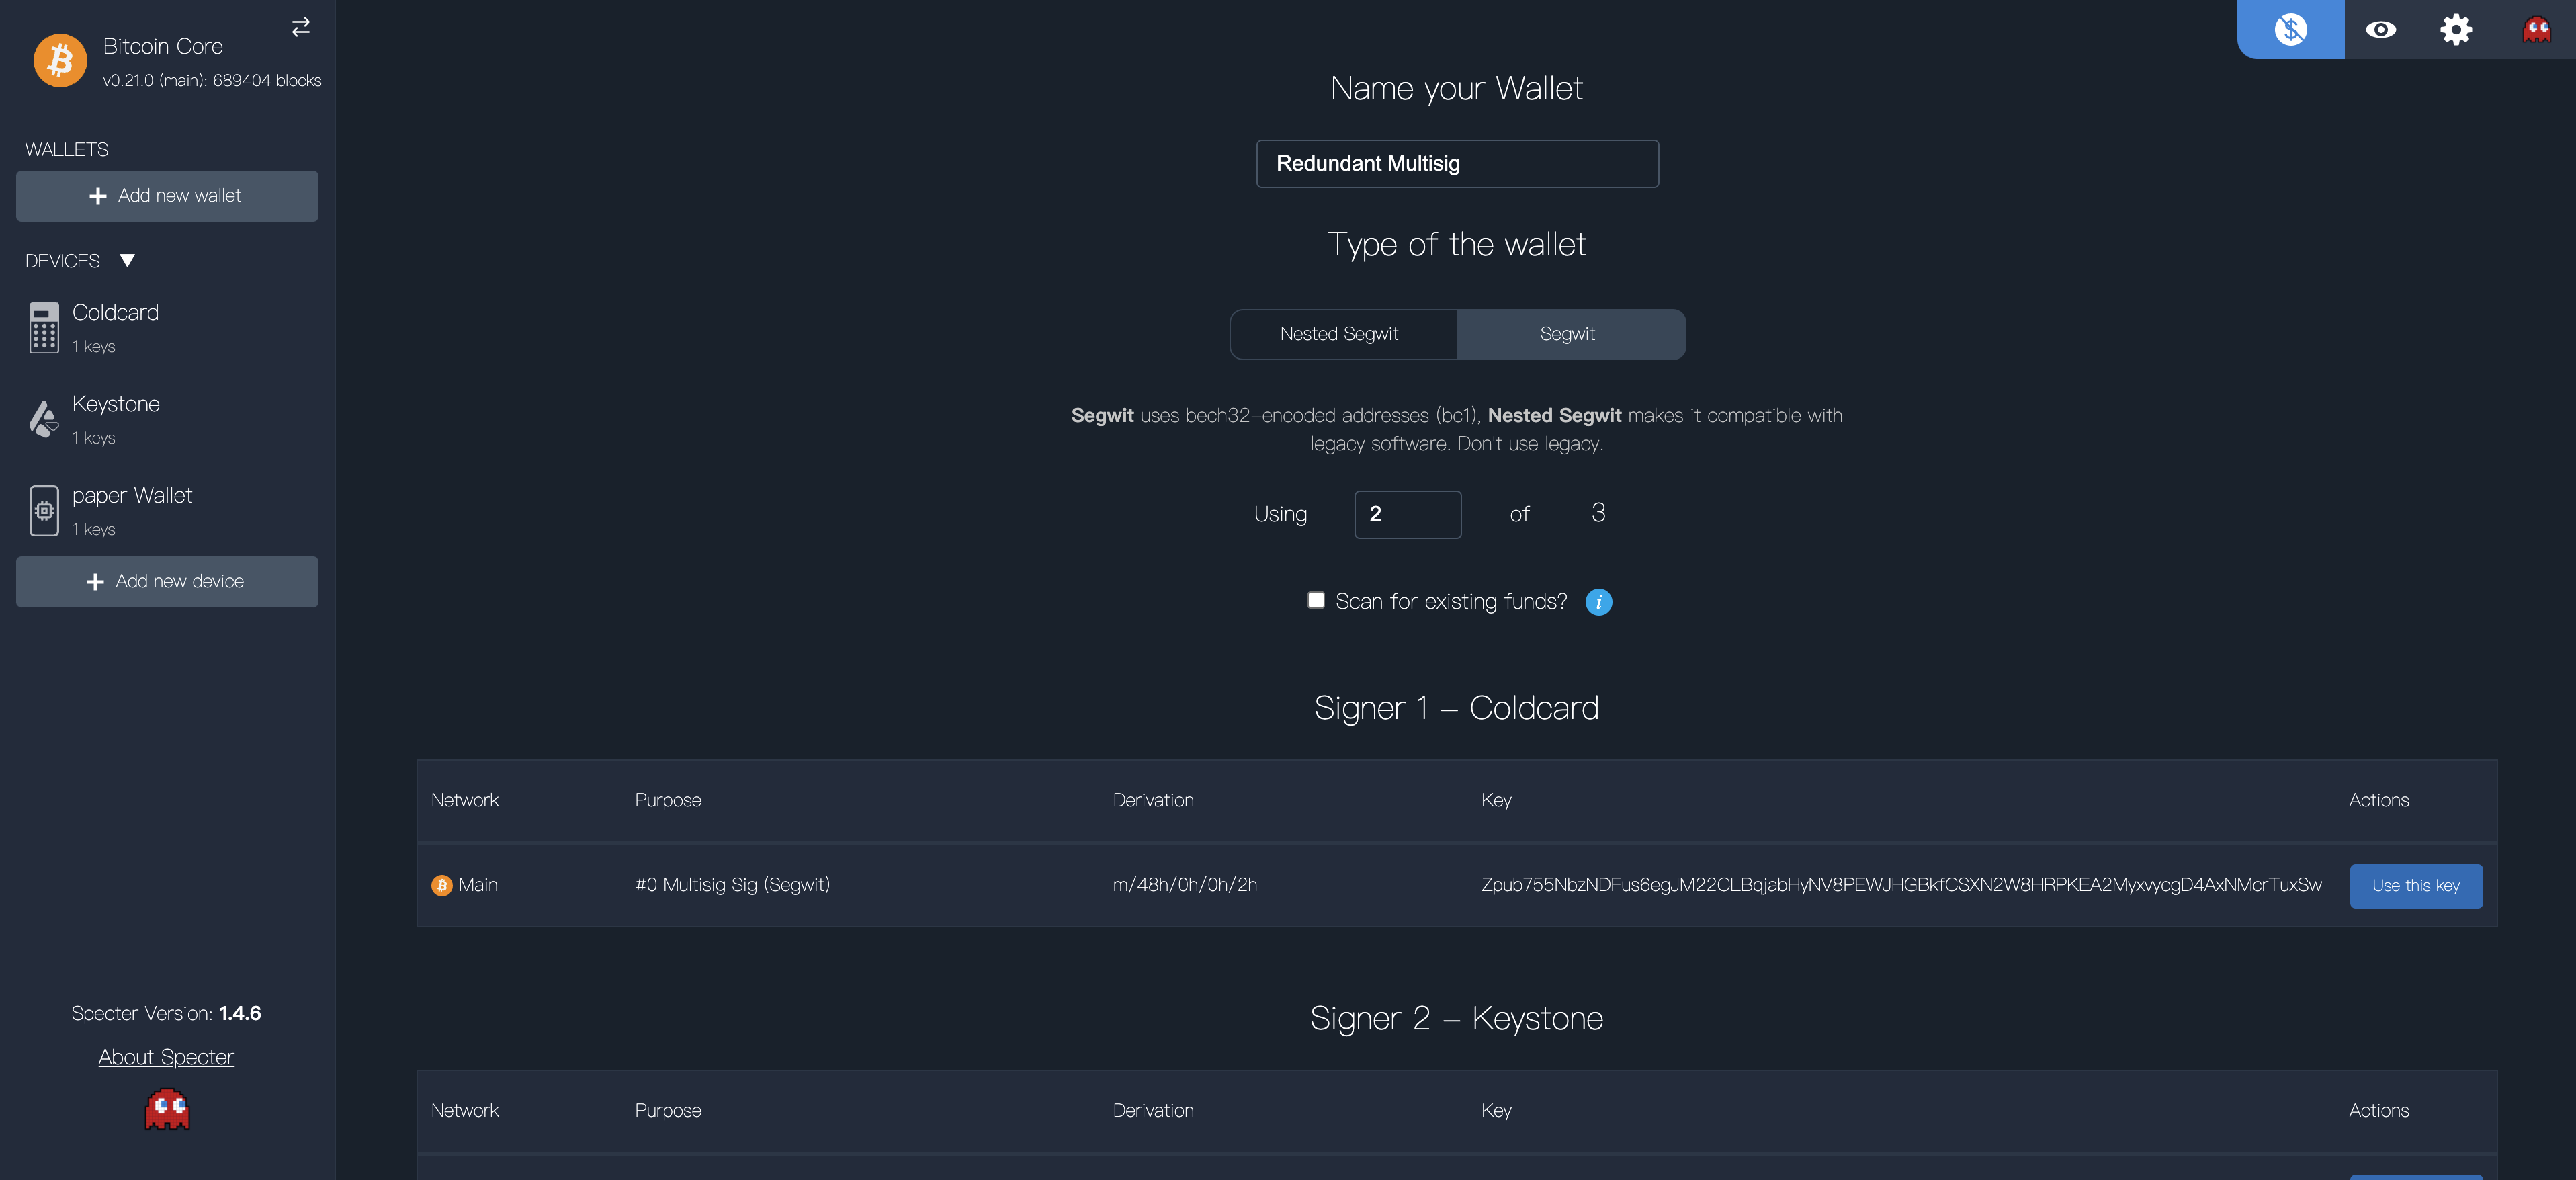
Give a name to your wallet (e.g.
Redundant Multisig), chooseSegwit(default),2-of-3(default) and select your 3 cosigners:Keystone,ColdcardandPaper Wallet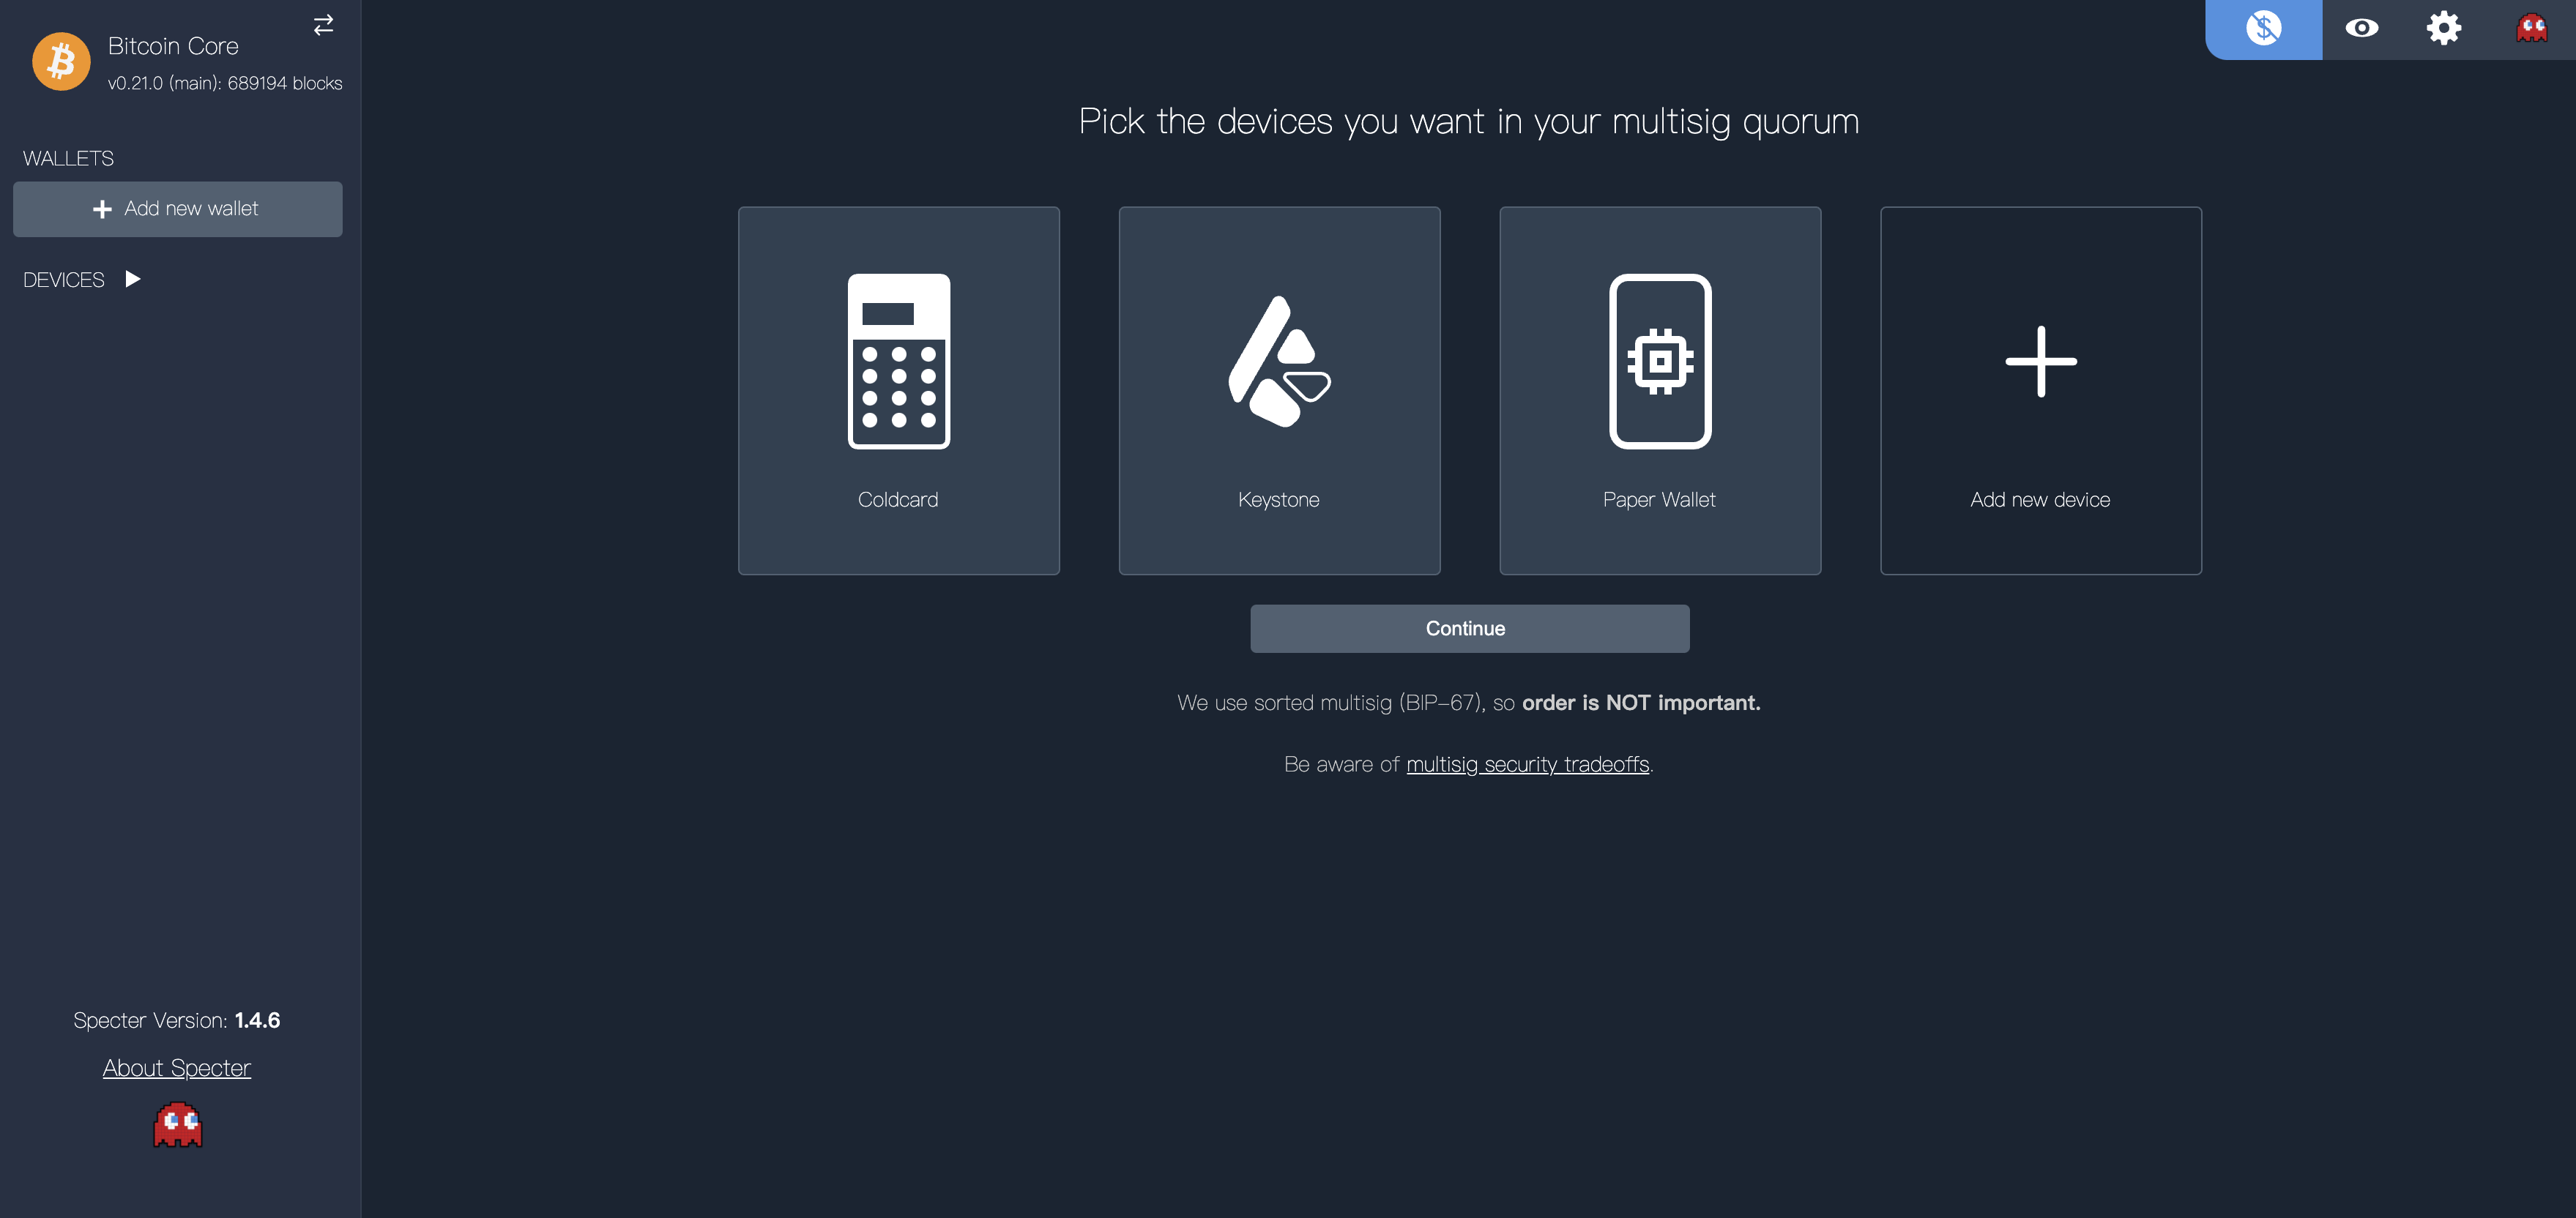
-
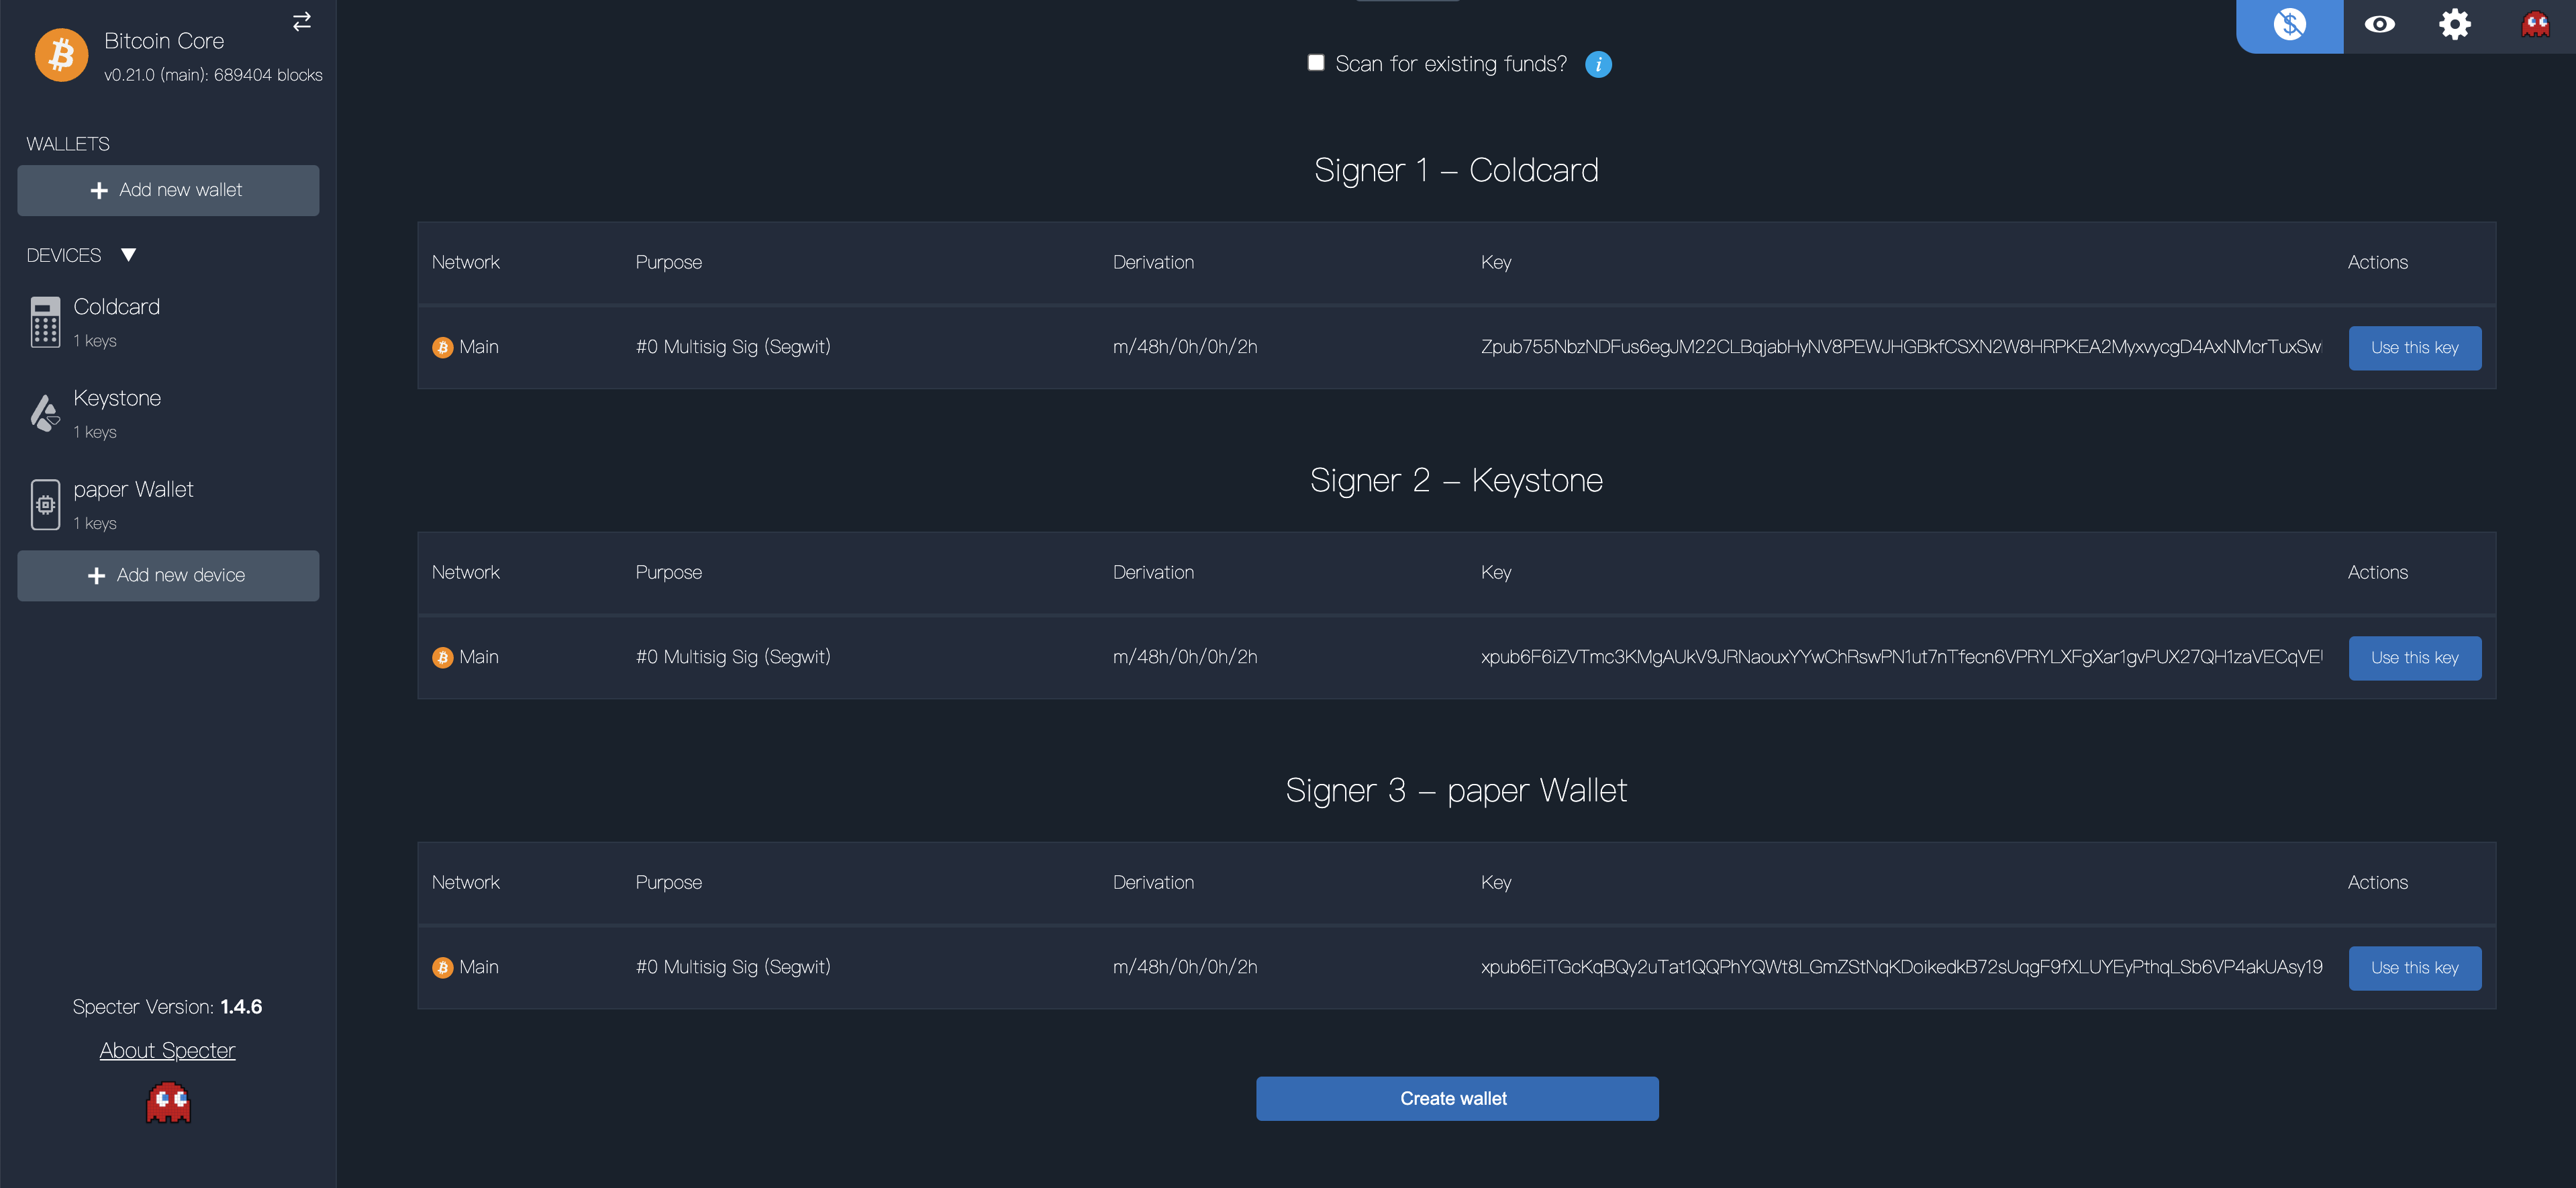
Select your public keys. If you’ve followed the default steps, you’ll just select all 3 of them.
-
See your first bitcoin address!
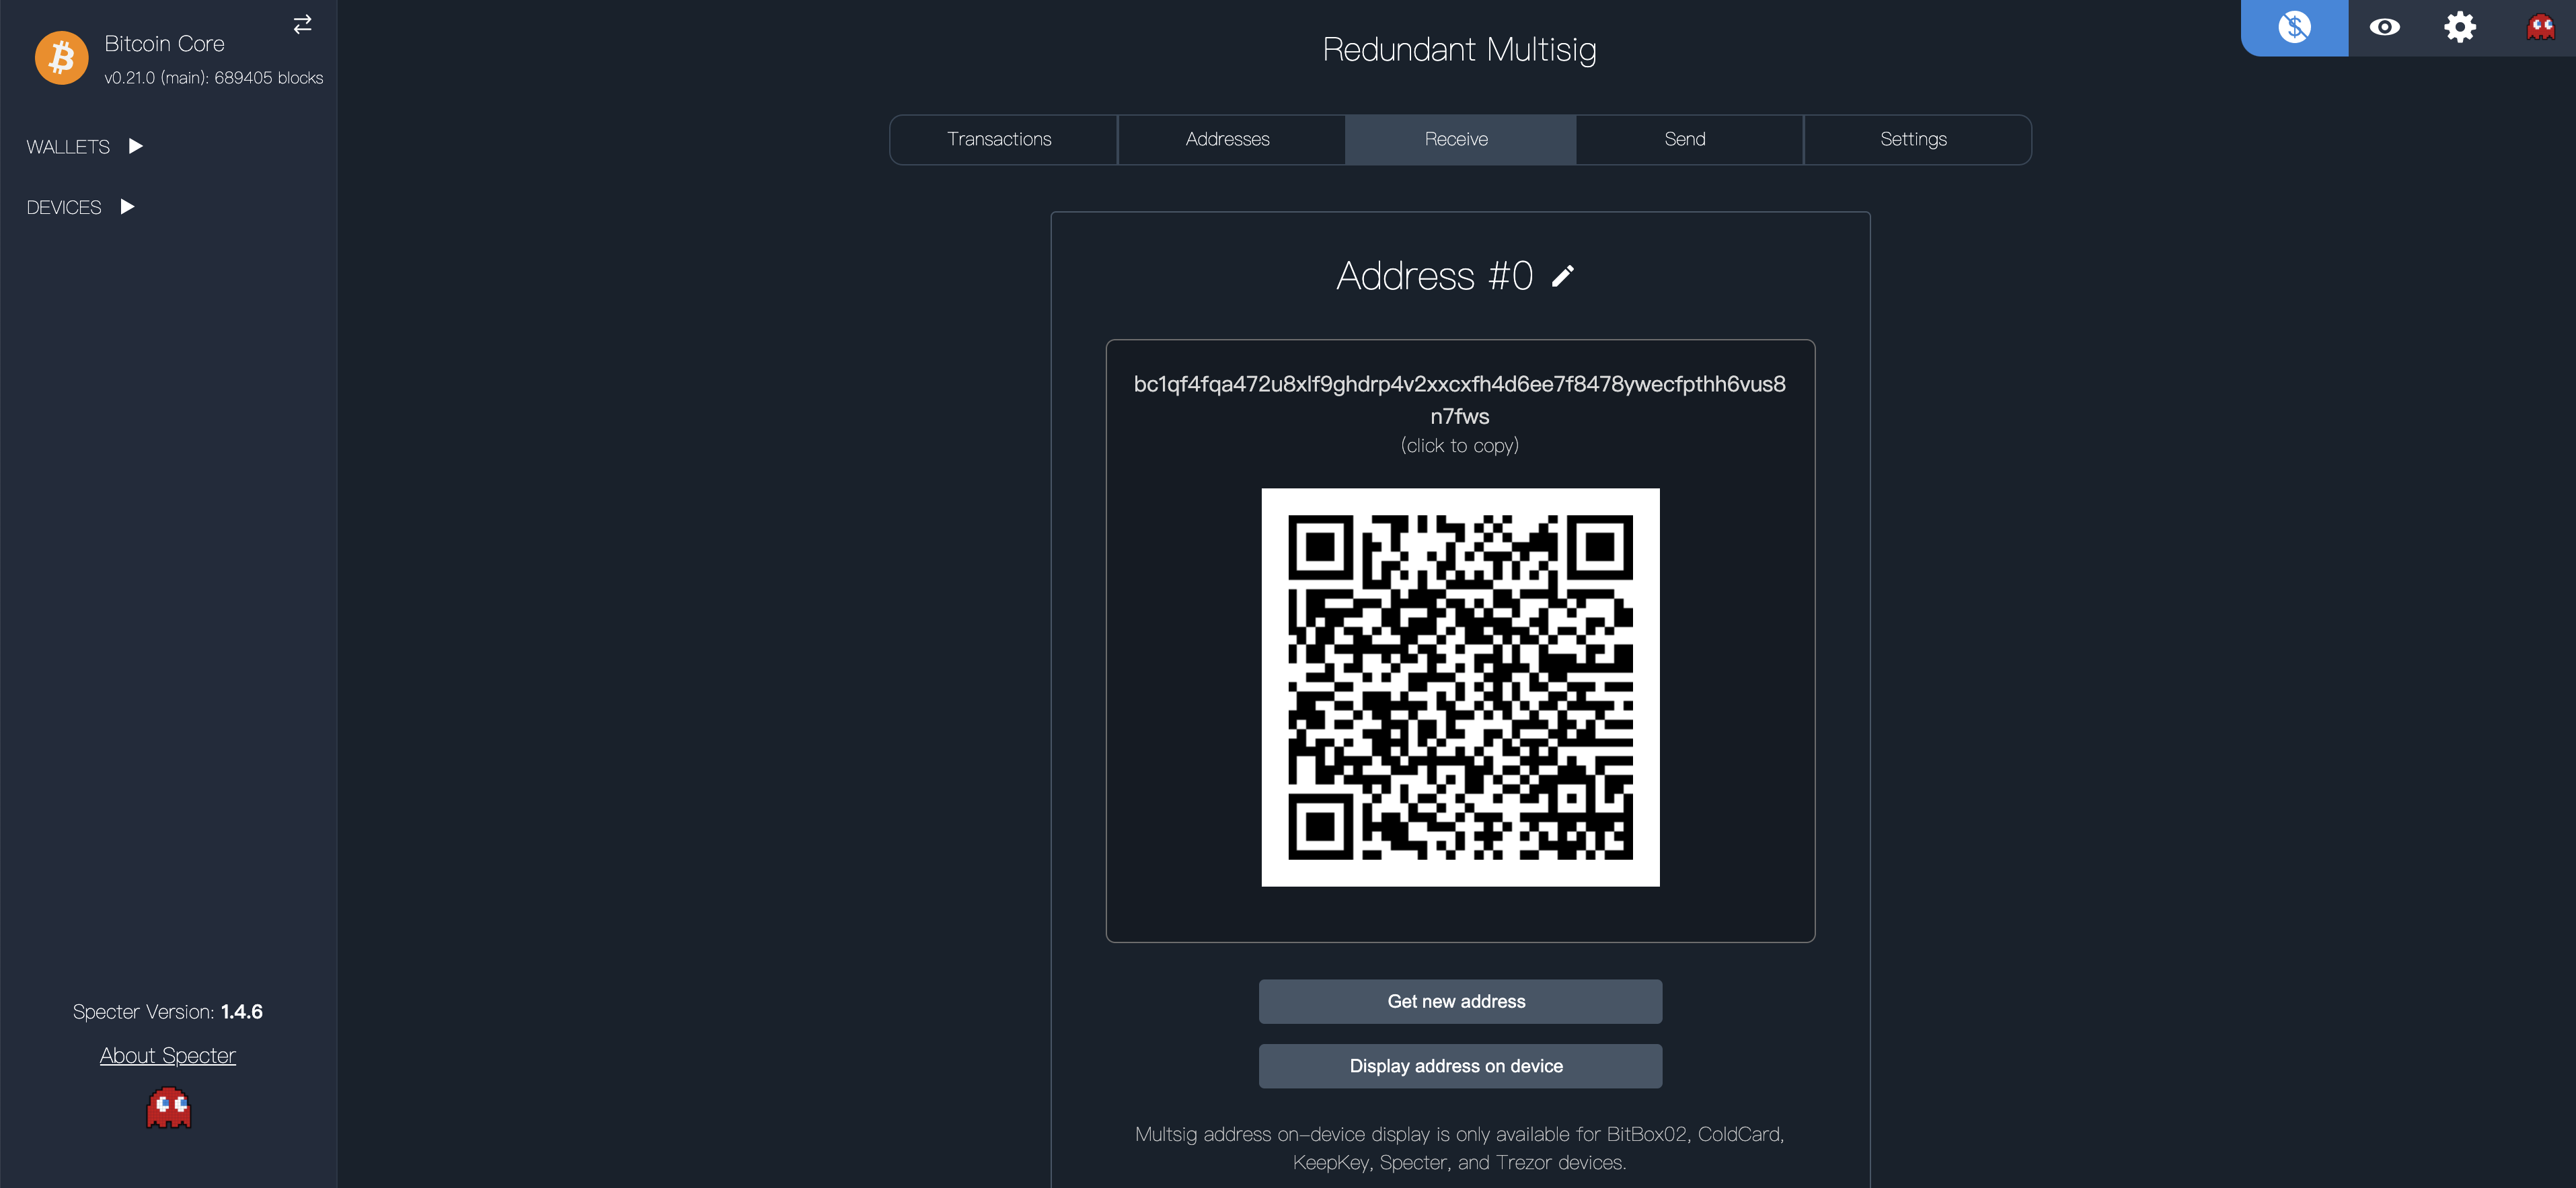 (we’ll learn how to trustlessly verify addresses in the Verify Receive Address section)
r multisig w Now that we have our multisig wallet configured in Specter-Desktop, we need to let the Keystone and Coldcard devices know about it.
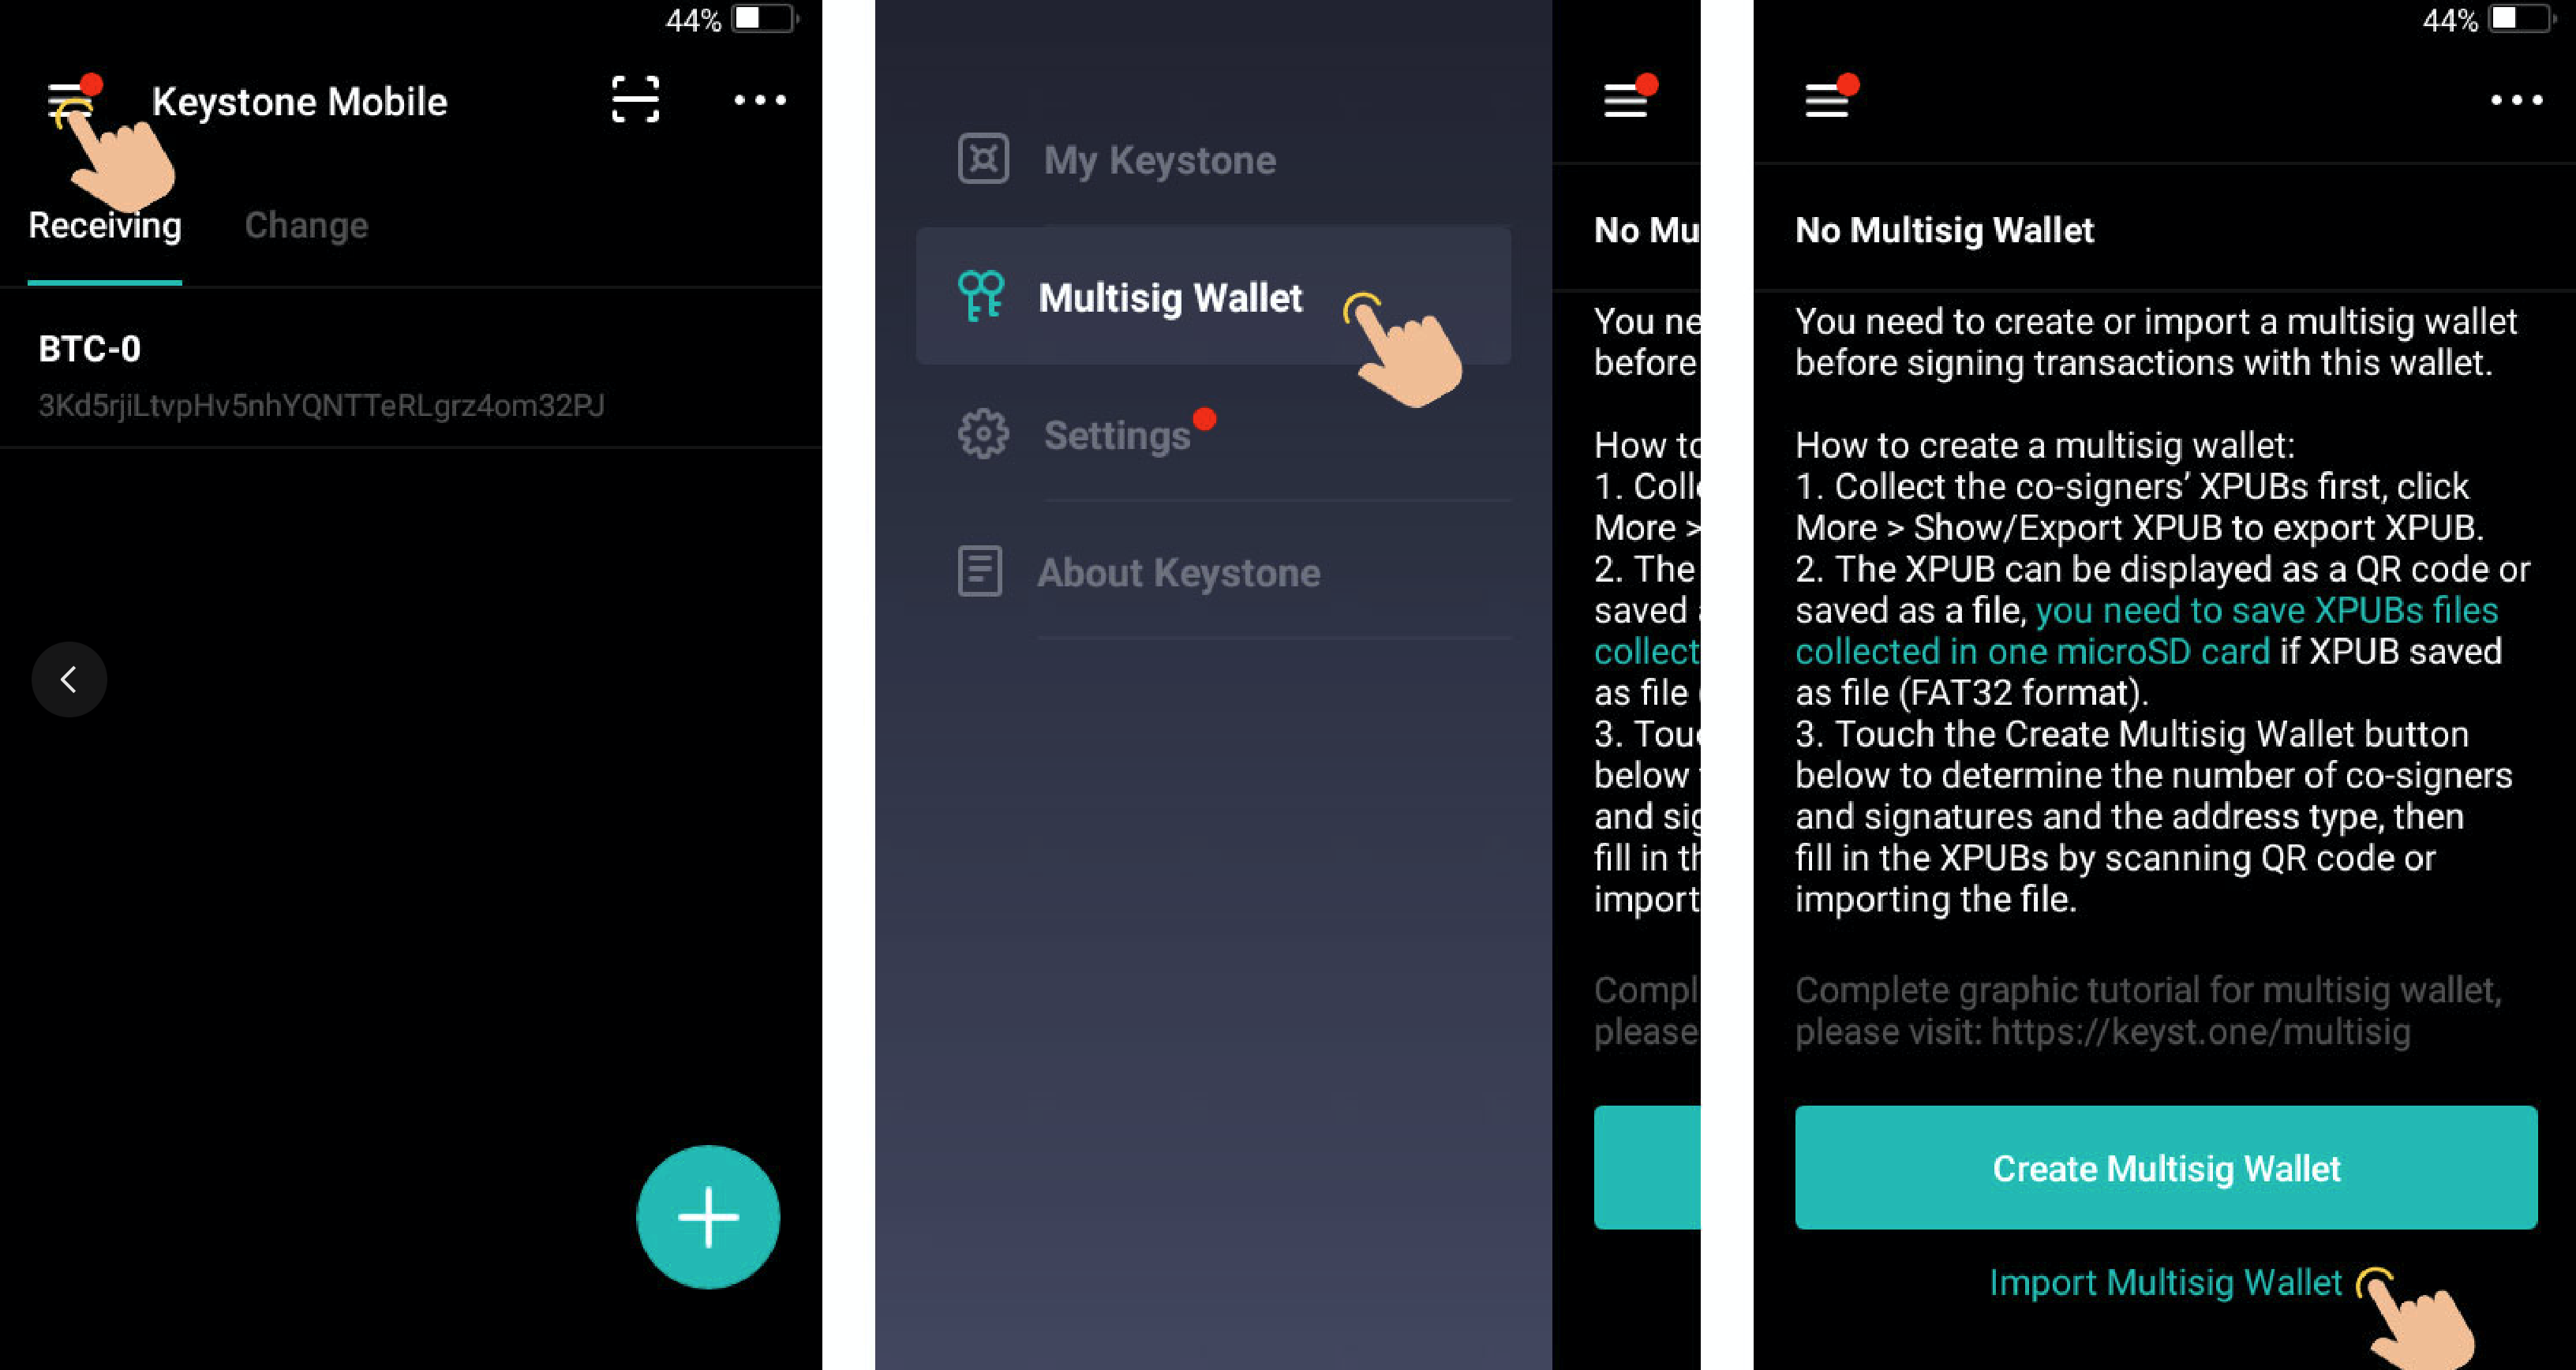
Setup Keystone
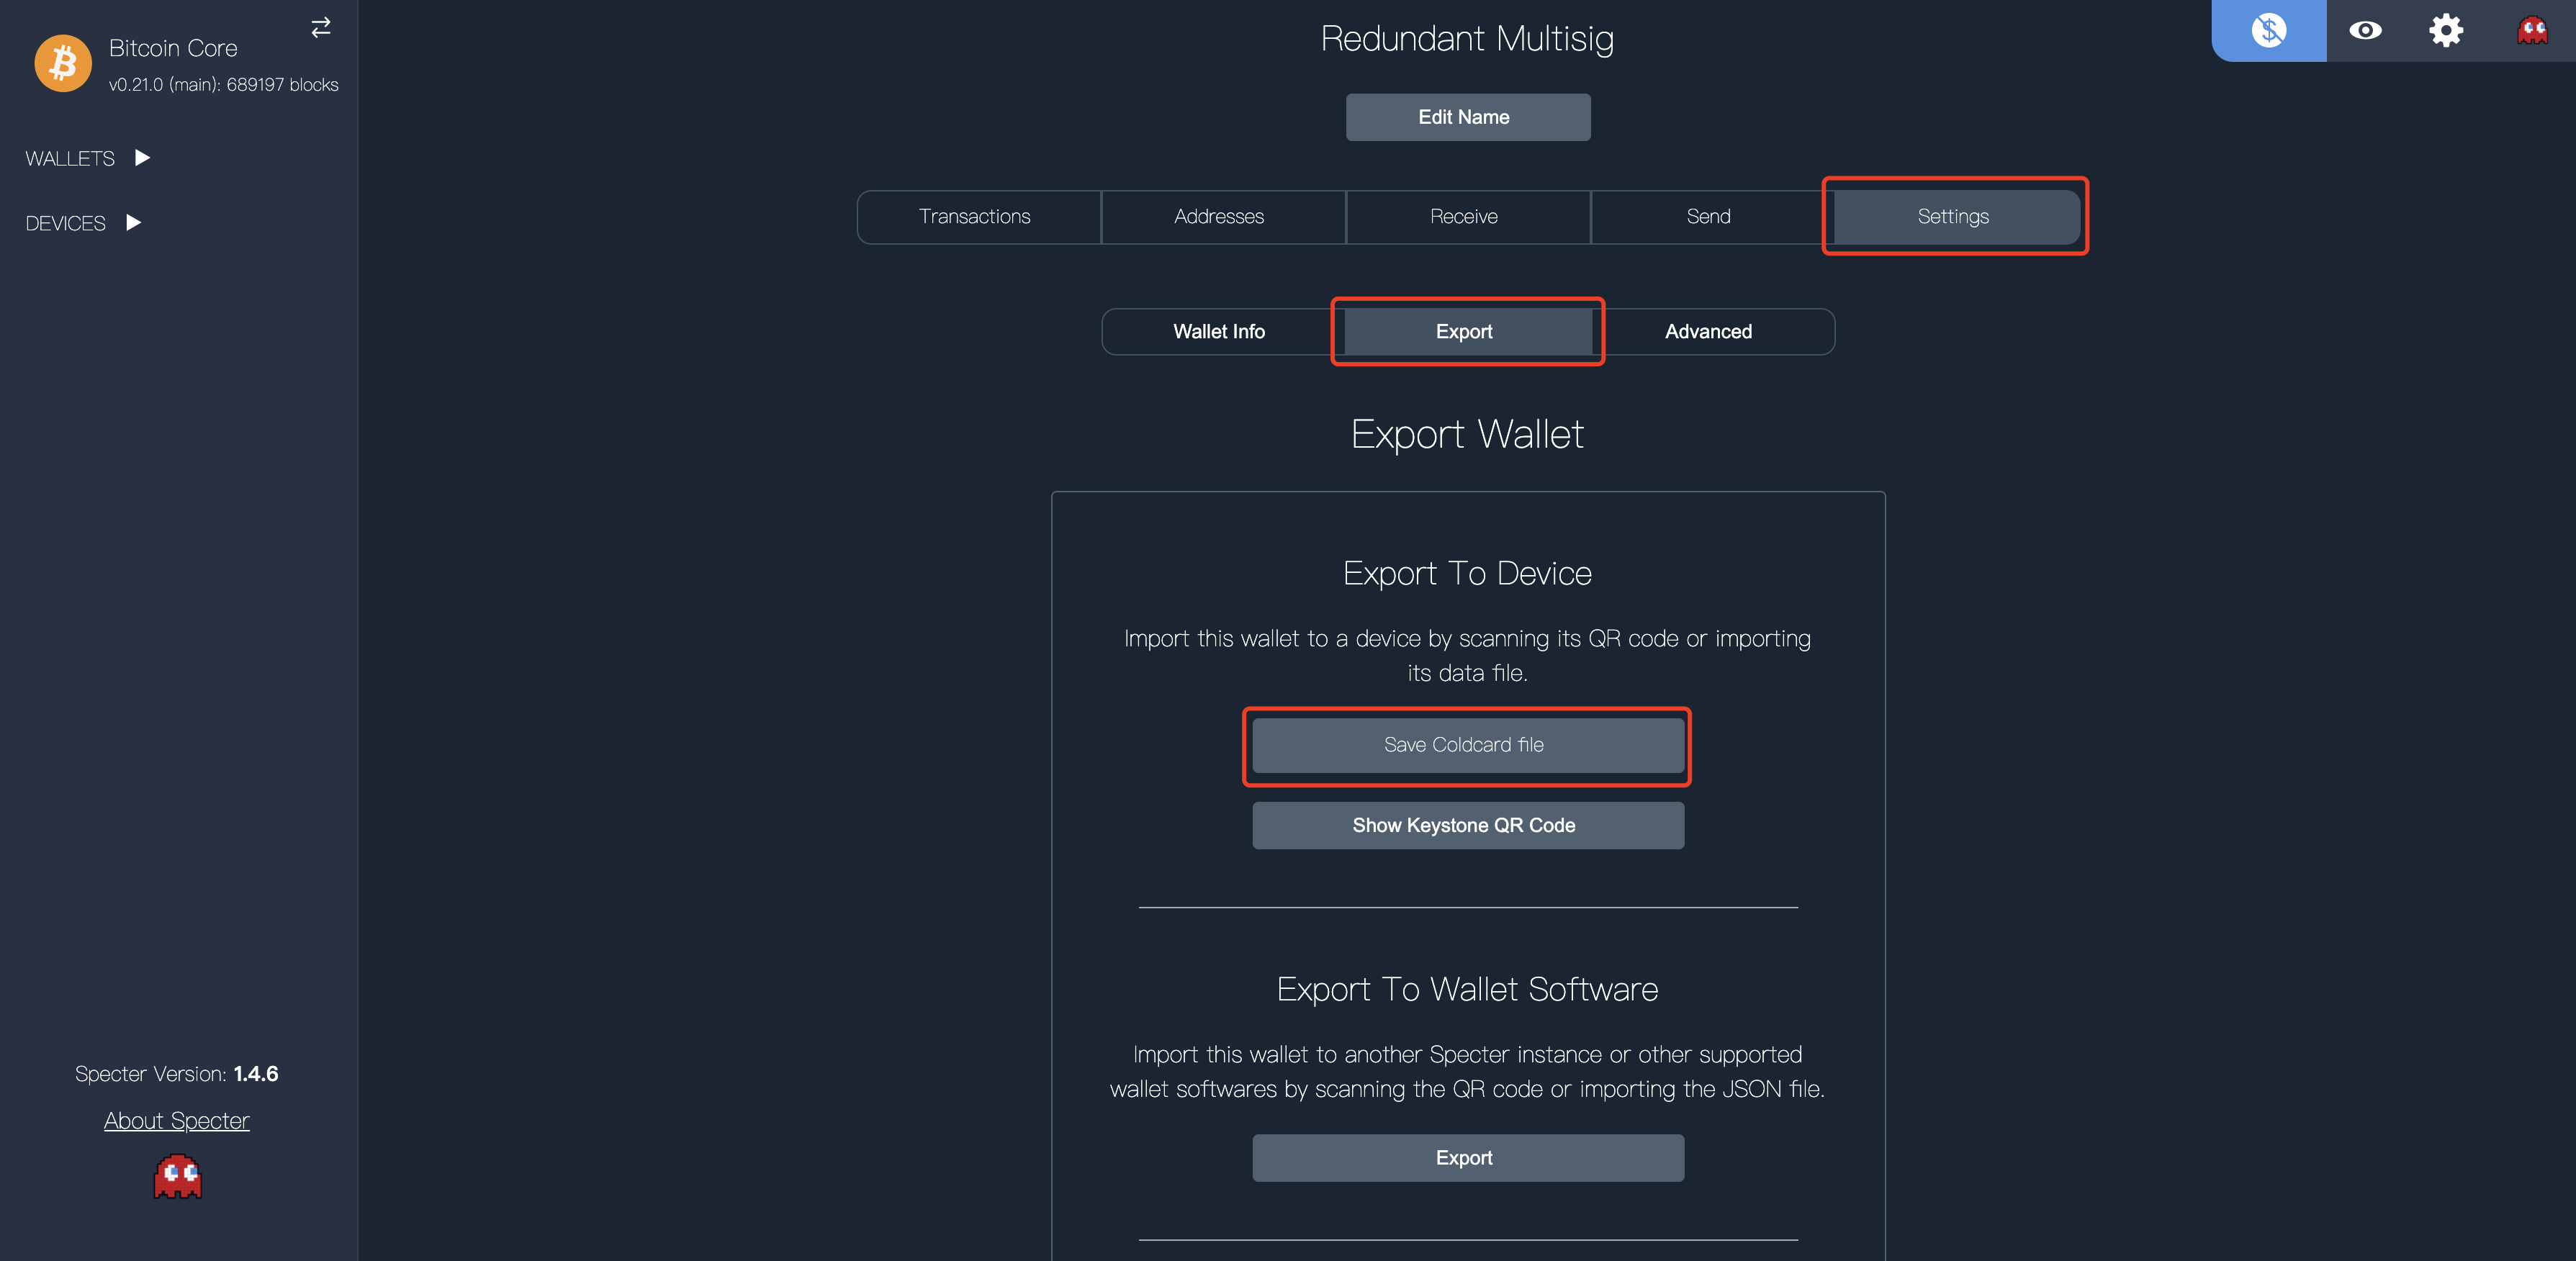
- On Specter-Desktop, select your multisig wallet (e.g.
Redundant Multisig) >Settings>Export>Show Keystone QR Code:
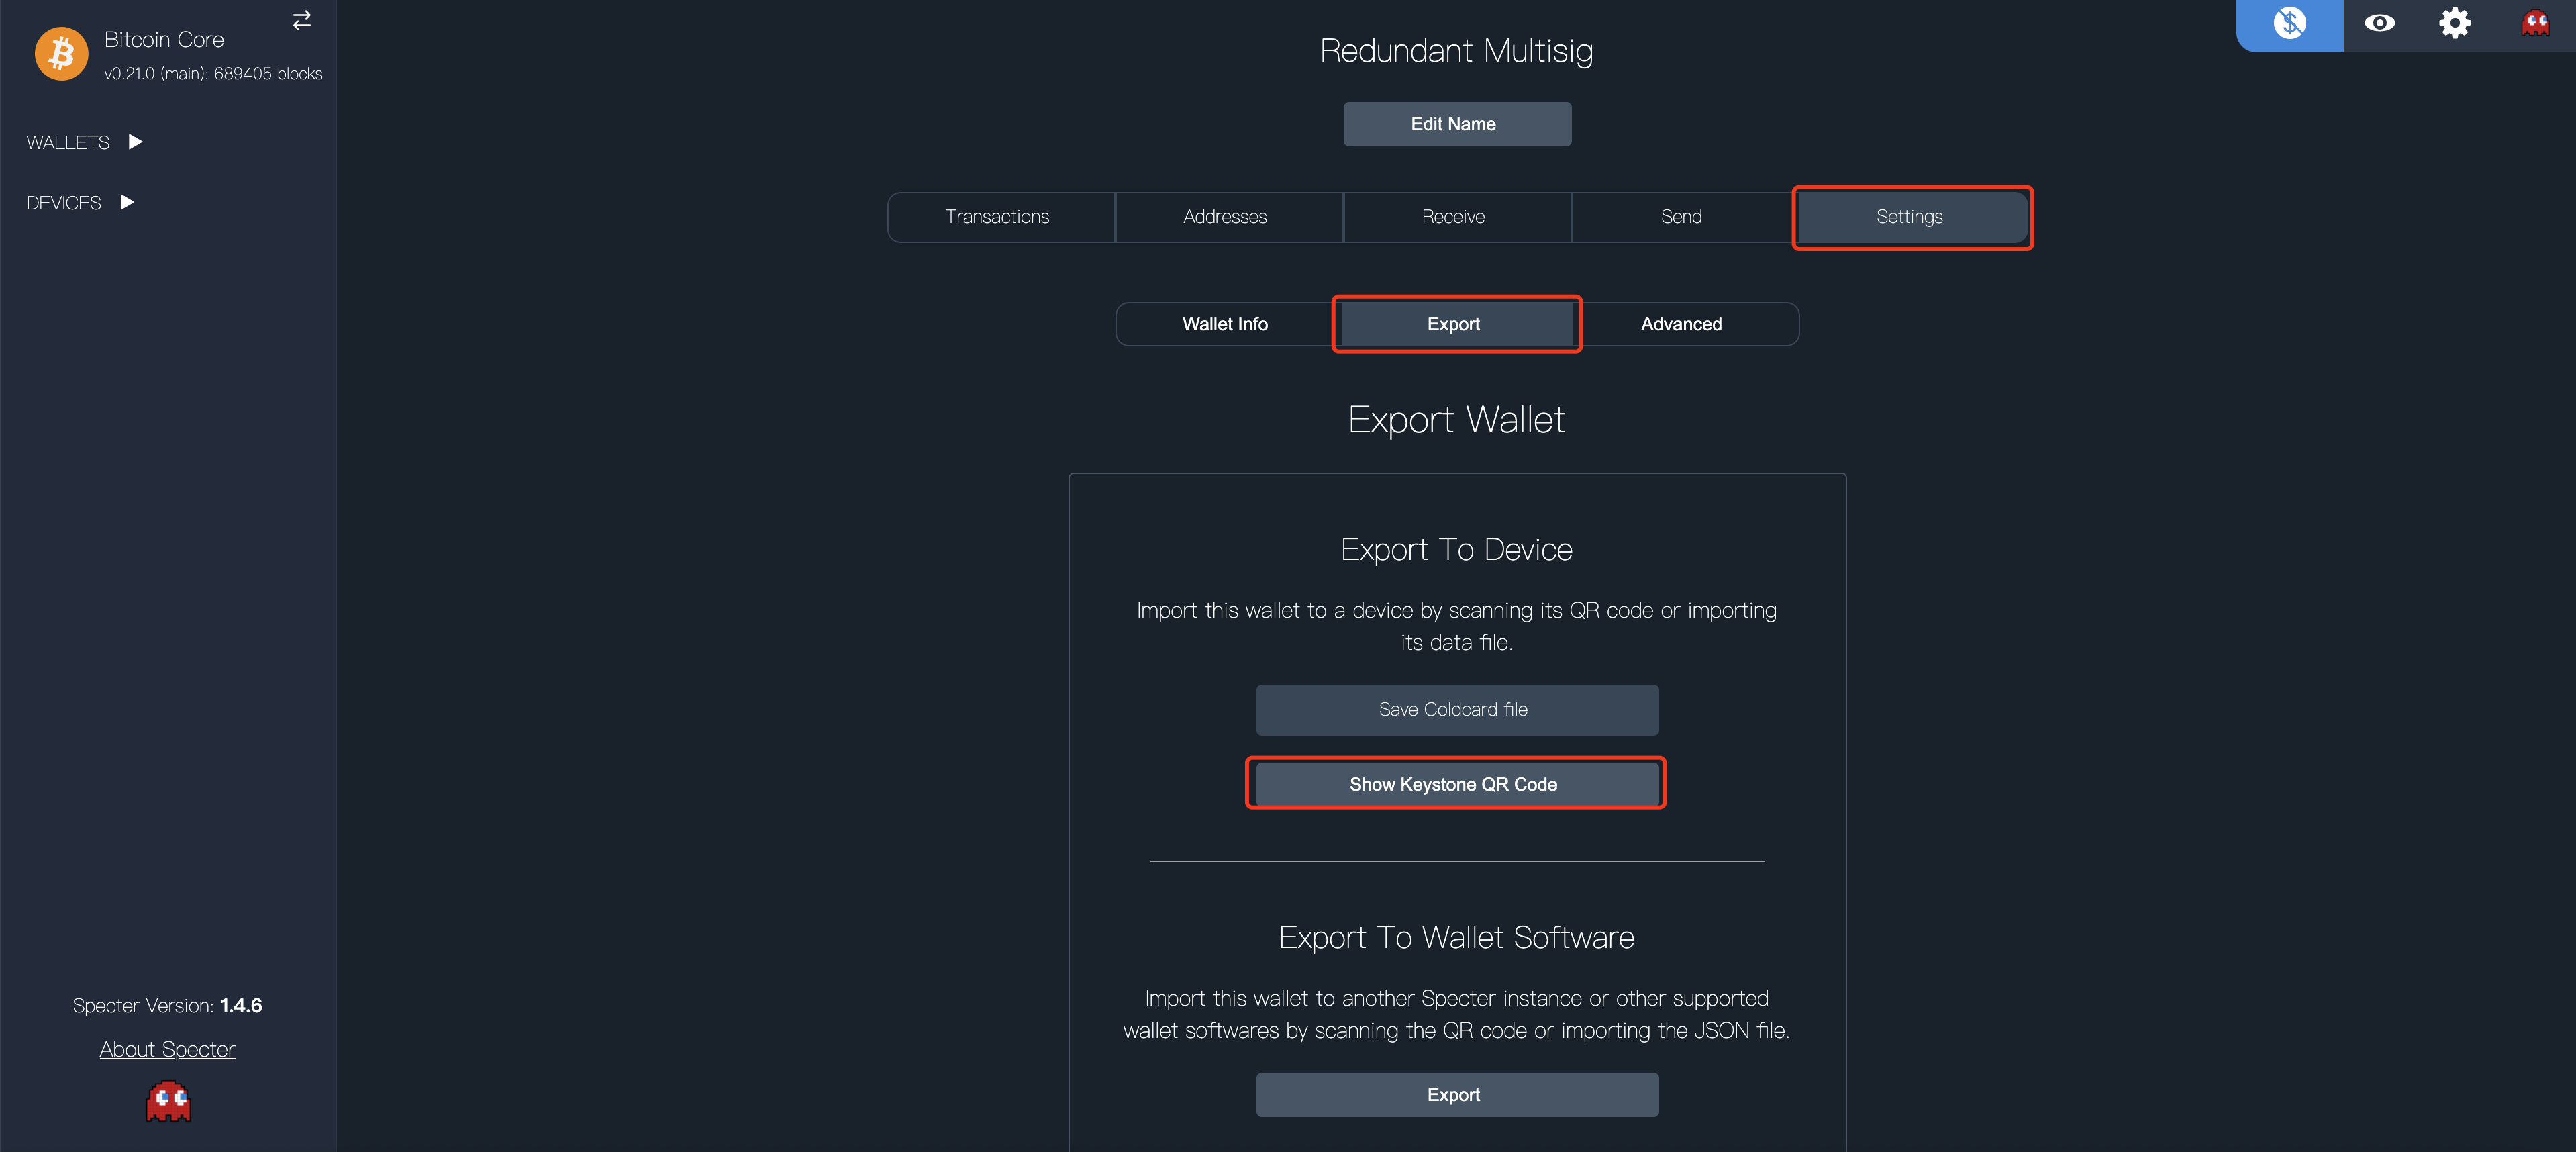
Specter-Desktop will display a popup like this:
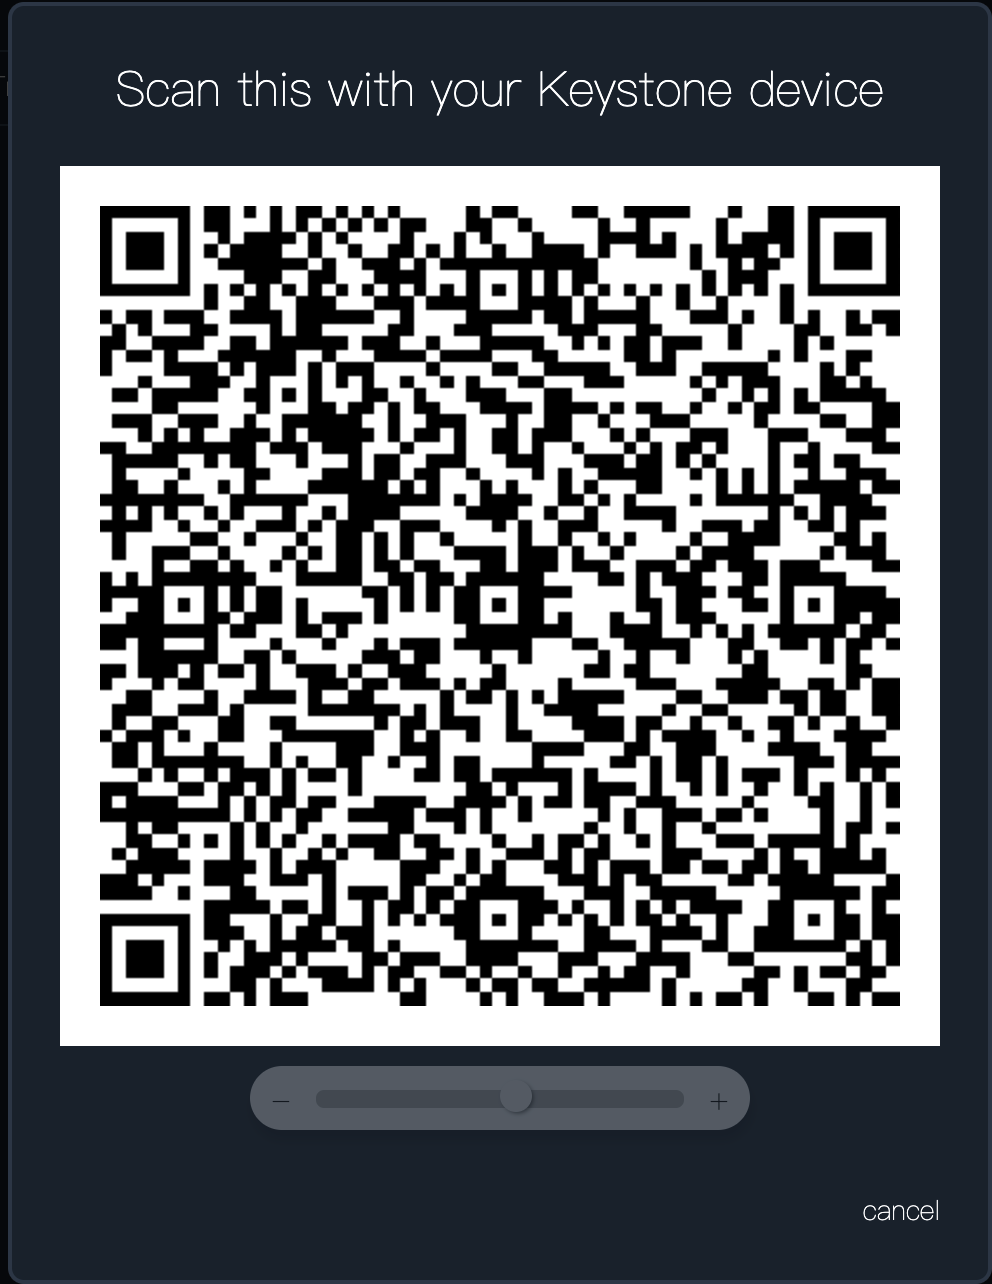
-
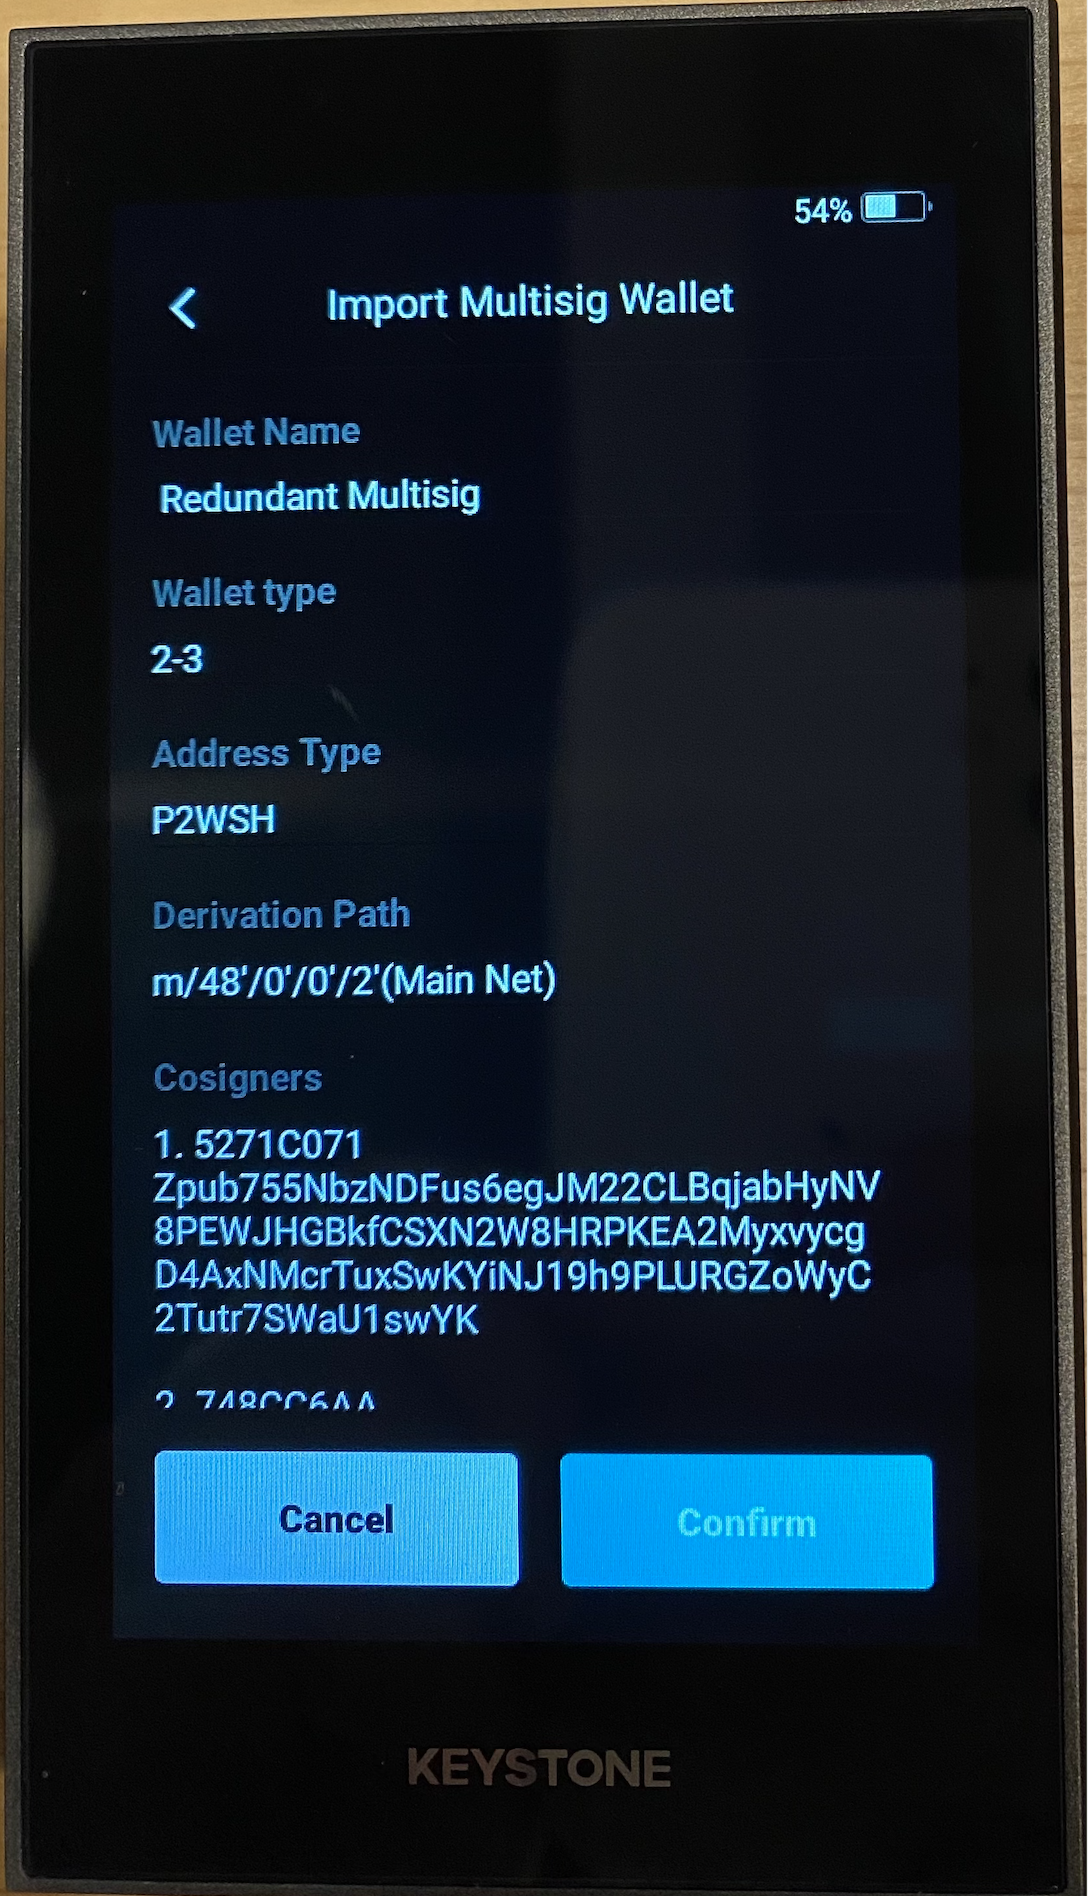
Scan the QR code on your Keystone:
-
View wallet information and confirm:

Setup Coldcard
-
On Specter-Desktop, select your multisig wallet (e.g.
Redundant Multisig) >Settings>Export>Download Coldcard File:
-
Save this file to your microSD card and put the microSD card in your Coldcard.
-
On your Coldcard, go to:
Settings>Multisig Wallets>Import from SD
 (select the file and press “OK” (✓))
Advanced Considerations
Comfortable with the concepts in this step?
Read the advanced considerations that can potentially improve your security here.
» Next Section: Verify Receive Address